28.7 Step 7: Install Other Drives
How you mount
hard disk drives, tape drives, and
optical drives varies from case to case, and may depend on the drive
itself and whether or not the drive is to be mounted in an externally
accessible bay. Some cases use multiple mounting methods, as follows:
- Direct attachment
-
With typical mini- and mid-tower cases, slide the drive into the bay
and secure it with screws to the bay itself. Depending on the
particular case and drive, you may need to slide the drive into place
from the front or from the back. Use the screws provided with the
drive to secure the drive. If no screws were provided with the drive,
make sure that the screws you use not only have the proper thread,
but are the proper length. A too-long screw can project inside the
drive enclosure and damage a circuit board or other component. Four
screws—front and back on each side—are adequate, although
there may be room to install as many as eight. Although it is not
recommended practice, we have sometimes secured a drive with only two
screws on the same side when the case design made it difficult to
drive screws into the other side. We have never had any problems
result from doing this, but if you do it, do so at your own risk.
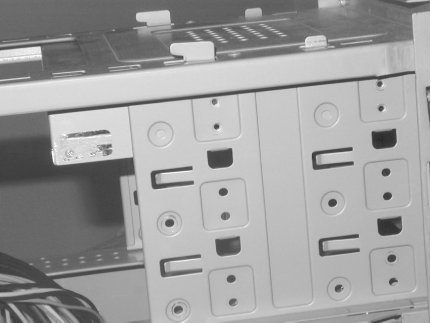
Figure 28-27 shows a typical mini-tower arrangement.
The drive in the top bay of this Antec KS288 case has all four screw
holes aligned with the corresponding chassis holes, which
automatically aligns the drive front-to-back to be flush with the
front bezel. Cases built with sloppier tolerances use slots rather
than holes to make up for the loose tolerances, although some
well-built cases also use slots.

 |
Ever wonder why stools have three legs? It's because
three points define a plane, and a three-legged stool is therefore
always stable, regardless of how uneven the surface it rests on. One
of our tech reviewers called this to our attention, and notes that
when working with inexpensive cases he often uses only three screws
to secure a drive because that minimizes the danger of the drive
being torqued if the case flexes. He (and we) has seen this happen in
cheap cases, and it can lead to anything from intermittent read and
write problems to premature drive failure. So if you are installing a
drive in a cheap case, consider using only three screws to do so.
Better yet, replace the case.
|
|
- Removable drive cages
-
Some cases use removable drive cages in which you install drives and
then mount the cage with installed drives as a single unit. Drive
cages are in all other respects similar to the arrangement described
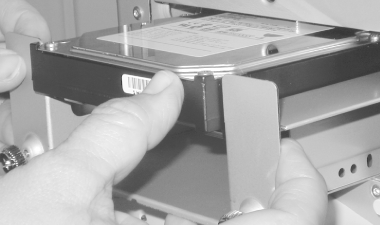
above. Figure 28-28 shows the removable drive cage
being installed in the Antec SX840 case, with the hard drive already
secured to the cage. This particular drive cage installs from the
front and is secured by thumbscrews. Other removable drive cages
install internally and are secured by standard screws or by a
clamping arrangement.

- Drive rails
-
Traditional desktop cases and some tower cases use drive rails, which
are secured to the drives and fit slotted channels within the case.
Rails are always mounted directly to the drive using screws. The
rails may be secured to the case by a screw through the front of the
rail into the front of the chassis, by a separate clip that screws
into the front of the chassis to prevent the rail from sliding
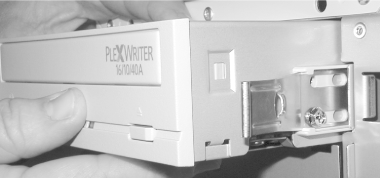
forward, or simply by snapping into place. Figure 28-29 shows the PlexWriter with attached rails being
slid into place in the Antec SX840 case. These rails snap into place,
which both secures the drive and aligns it properly front-to-back so
that it is flush with the main front bezel once it is reinstalled.

Whichever mounting method(s) your case uses, verify that all
externally accessible drives project the correct distance to ensure
that they are flush with the front chassis bezel when it is
installed. Some cases have alignment holes or snap-in drive rails
that make this job trivial. Others require trial and error. In that
situation, we usually mount one drive, temporarily mount the front
chassis bezel to ensure proper alignment, and then install all other
drives flush with the first drive we installed.
You may have to depart from your planned arrangement of drives if you
encounter vertical alignment problems. Some externally accessible
drives have front bezels that are just enough oversize or with an
incorrect vertical offset that you cannot install another externally
accessible drive in the bay immediately above or below the problem
drive. You can sometimes gently force such a drive to seat, but
it's usually better to rearrange the drives to avoid
such tight fits.
Before you install each drive, consider data cabling. If the drive is
the only drive that will connect to a data cable,
it's easier to attach the cable to the drive first
and then feed the cable through the bay and into the chassis. If
multiple drives will connect to the same data cable, choose the drive
for which rear access will be most difficult after the drive is
installed and connect the cable to that drive before you install the
drive.
After you install and secure each drive, connect the data cable (if
you have not done so previously) and then the power cable.
|


