
|
|
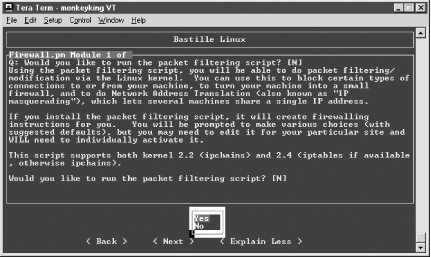
3.2 Automated Hardening with Bastille LinuxThe last tool we'll explore in this chapter is Bastille. You might be wondering why I've saved this powerful hardening utility for last: doesn't it automate many of the tasks we've just covered? It does, but with two caveats. First, it's very Red Hat-centric. It simply will not run on any distribution besides those derived from Red Hat, specifically Red Hat itself, Mandrake, and Immunix (although future versions may include support for Debian, SuSE, TurboLinux, and HP/UX). Second, even if you do run a supported distribution, it's extremely important that you use Bastille as a tool rather than a crutch. There's no good shortcut for learning enough about how your system works to secure it. The Bastille guys (Jay Beale and Jon Lasser) are at least as convinced of this as I am: Bastille has a remarkable focus on educating its users. 3.2.1 BackgroundBastille Linux is a powerful set of Perl scripts, which both secures Linux systems and educates their administrators. It asks clear, specific questions about your system that allow it to create a custom security configuration. It also explains each question in detail so that by the time you've finished a Bastille session, you've learned quite a bit about Linux/Unix security. If you already understand system security and are only interested in using Bastille to save time, you can run Bastille in an "explain-less" mode that asks all the same questions but skips the explanations. 3.2.1.1 How Bastille came to beThe original goal of the Bastille team (led by Jon Lasser and Jay Beale) was to create a new secure Linux distribution based on Red Hat. The quickest way to get their project off the ground was to start with a normal Red Hat installation and then to "bastille-ify" it with Perl scripts. Before long, the team had decided that a set of hardening scripts used on different distributions would be less redundant and more flexible than an entirely new distribution. Rather than moving away from the script approach altogether, the Bastille team has instead evolved the scripts themselves. The Perl scripts that comprise Bastille Linux are quite intelligent and make fewer assumptions about your system than they did when Bastille was used only on fresh installations of Red Hat. Your system need not be a "clean install" for Bastille to work: it transparently gleans a good deal of information about your system before making changes to it. 3.2.2 Obtaining and Installing BastilleTo get the latest version of Bastille Linux, point your web browser to http://www.bastille-linux.org/. This page contains links to the Bastille packages and also contains complete instructions on how to install them and the Perl modules that Bastille requires. Unlike earlier versions, Bastille 1.2 is now distributed as a set of RPMs in addition to its traditional source-code tarball. If you opt for the RPMs, which is recommended, you'll need the "main" package, currently Bastille-1.2.0-1.1mdk.noarch.rpm, plus one or both of the Bastille user interfaces: the X (Tk) version, currently Bastille-Tk-module-1.2.0-1.1mdk.noarch.rpm), or the text (ncurses) version, currently Bastille-Curses-module-1.2.0-1.1mdk.noarch.rpm. I recommend the text-based interface. Bastille, unlike the scanners we just covered, must be run on the host you wish to harden. (Remember, bastion hosts shouldn't run the X Window System unless absolutely necessary.) This interface not only requires the appropriate Bastille module, but also the package perl-Curses. Red Hat and Mandrake both have this package; otherwise, you can also download it from the Bastille web site. Once your RPMs have successfully installed, you're ready to harden. 3.2.3 Running BastilleBastille 1.2 has been simplified somewhat over previous versions: you now need run only a single executable, InteractiveBastille . If you installed both user interfaces, this script will invoke the Tk interface by default. To specify the ncurses interface, use this command: InteractiveBastille -c Now read Bastille's explanations (Figure 3-15), answer its questions, and when you reach the end, reboot to implement Bastille's changes. That's really all there is to running Bastille. Figure 3-15. InteractiveBastille session 3.2.4 Some Notes on InteractiveBastilleInteractiveBastille explains itself extremely well during the course of a Bastille session. This verbosity notwithstanding, the following general observations on certain sections may prove useful to the beginner:
3.2.5 Bastille's LogsSo, after InteractiveBastille is finished and the system is rebooted, what then? How do we know what happened? Thanks to Bastille's excellent logging, it's easy to determine exactly which changes were successful and, equally important, which failed. It's probably a good idea to review these logs regardless of whether you think something's gone wrong; meaningful logging is one of Bastille's better features. Whether a beginner or a security guru, you should know not only what changes Bastille makes, but how it makes them. Bastille writes its logs into /root/Bastille/log/. Two logs are created by BackEnd.pl: action-log and error-log. action-log provides a comprehensive and detailed accounting of all of Bastille's activities. Errors and other unexpected events are logged to error-log. 3.2.6 Hooray! I'm Completely Secure Now! Or Am I?Okay, we've carefully read and answered the questions in InteractiveBastille, we've rebooted, and we've reviewed Bastille's work by going over its logs. Are we there yet? Well, our system is clearly much more secure than it was before we started. But as Bruce Schneier is fond of saying, security is a process, not a product: while much of the work necessary to bastionize a system only needs to be performed once, many important security tasks, such as applying security patches and monitoring logs, must be performed on an ongoing basis. Also, remember our quest for "Defense in Depth": having done as much as possible to harden our base operating system, we still need to leverage any and all security features supported by our important applications and services. That's what the rest of this book is about. |

|
|