|
|
|
7.2 Introducing the Group Policy Snap-inFor defining and controlling how various components of Windows 2000 behaves for users and computers, Group Policy is used. Group Policy is a Microsoft Management Console (MMC) snap-in that allows you to manage the behavior of programs, network resources, and the operating system.
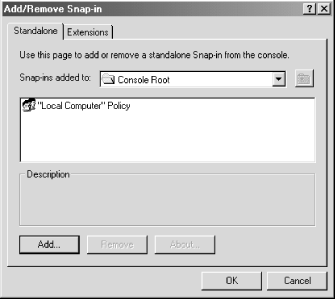
7.2.1 Adding the Group Policy Snap-inTo add the Group Policy snap-in to the MMC, run mmc.exe. From the Console menu in the MMC, choose Add/Remove Snap-in. Click the Add button on the Standalone tab and select Group Policy from the list of snap-ins provided. You're then required to choose a Group Policy Object to edit. Remember that group policy objects can be stored locally on a computer or can be linked to an Active Directory organizational unit, domain, or site. The Select Group Policy Object dialog defaults to the local computer as the target GPO but allows you to browse through domains, OUs, sites, and computers to select the GPO you're interested in editing. Once you've decided on a GPO, click the Finish button and close the list of provided snap-ins. If everything went well, you're back on the Standalone tab of the Add/Remove Snap-in dialog, and you see your target GPO listed as a snap-in under to the Console Root. Figure 7.1 shows the Local Computer Policy as the only added snap-in. Figure 7.1. The Add/Remove Snap-in dialog You select the functionality of the snap-in by adding Group Policy extensions. Group Policy extensions correspond to areas of the Group Policy that you can edit. The following is a list of Group Policy extensions:
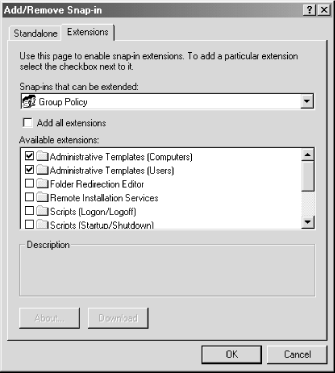
To add one or more extensions to the Group Policy snap-in, select the Extensions tab on the Add/Remove Snap-in dialog. By choosing Group Policy from the dropdown list of snap-ins that can be extended, the available extensions are displayed, as illustrated in Figure 7.2. Figure 7.2. Available Group Policy Extensions dialog You can select extensions on an individual basis or mass add all extensions by setting the Add all extensions checkbox.
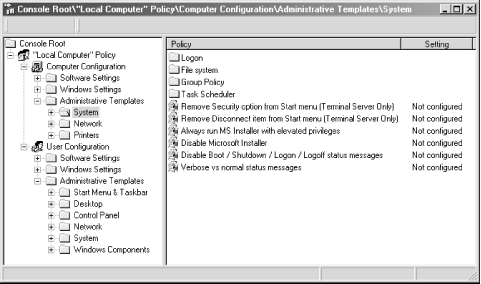
7.2.2 Learning the Group Policy Snap-in InterfaceIf you've already used any of the MMC snap-ins, you'll be instantly familiar with the interface for Group Policy. The console is divided into two panes: the left pane holds the console tree, and the right pane displays information such as policies and settings. Each node in the console tree under the Console Root represents an instance of an added snap-in. Thus, by adding Group Policy with different GPOs, you can manage multiple objects from the single console tree. Figure 7.3 shows a single GPO (the local group policy object) under the console root, with the Administrative Templates (Computers) and Administrative Templates (Users) extensions previously added. Figure 7.3. The Group Policy MMC snap-in with Local Computer Policy added 7.2.2.1 Controlling what you seeThe MMC provides a consistent interface for many facets of Windows
2000. The commands that modify the display apply to the MMC as a
whole, not just Group Policy. The first thing you realize about MMC,
as you start adjusting window sizes and resizing panes, is that MMC
allows you to open more than one console window at a time. The Window
The View menu provides a way to change the appearance of the console
window. The View The right pane of the MMC displays pertinent information about the
node selected in the console tree. The View menu provides four ways
to view this information. The View The View 7.2.2.2 Navigating the console treeThe console tree acts in much the same way as the Windows Explorer tree view. You expand branches by clicking the plus beside the node you want to expand and contract them by subsequently clicking the minus sign. You highlight a node to display its individual settings in the right pane. The up arrow icon on the standard buttons toolbar hikes you back up the hierarchical chain of the console tree until you reach the root. Some of the nodes have special commands associated with them. For example, the Administrative Templates node allows you to Add/Remove Templates. To view the menu associated with a specific node, simply right-click that node. I'll explore some of these special commands in a bit. 7.2.2.3 Viewing policy propertiesAs stated previously and shown back in Figure 7.3, most Group Policy leaf node information contains policies and corresponding settings. To view the properties of a particular policy, right-click the policy in the right pane and select Properties. |
|
|
|