| [ Team LiB ] |
|
22.1 Importing ActiveX ControlsActiveX controls are COM components typically dropped into a form, which might or might not have a user interface. When Microsoft developed the OCX standard, which allowed developers to build ActiveX controls in Visual Basic and use them with C++ (and vice versa), the ActiveX control revolution began. Over the past few years, thousands of such controls have been developed, sold, and used. They are small, easy to work with, and an effective example of binary reuse. Importing ActiveX controls into .NET is surprisingly easy, considering that the COM binary standard and the .NET binary standard are not compatible. Visual Studio .NET is able to import ActiveX controls. Microsoft has also developed a command-line utility, AxImp, which will create the assemblies necessary for the control to be used in a .NET application. 22.1.1 Creating an ActiveX ControlTo demonstrate the ability to use classic ActiveX controls in a .NET application, first develop a simple four-function calculator as an ActiveX control and then invoke that ActiveX control from within a C# application. Build the control in VB6, and test it in a VB6 application. If you don't have VB6 or don't want to bother creating the control, you can download the control from my web site (http://www.LibertyAssociates.com). Once the control is working in the standard Windows environment, you'll copy it to your .NET development environment, register it, and import it into a Windows Forms application. To create the control, open VB6 and choose ActiveX Control as the new project type. Make the project form as small as possible, because this control will not have a user interface. Right-click UserControl1 and choose Properties. Rename it Calculator in the Properties window. Click the Project in the project explorer, and in the Properties window, rename it CalcControl. Immediately save the project and name both the file and the project CalcControl, as shown in Figure 22-1. Figure 22-1. Creating a VB ActiveX control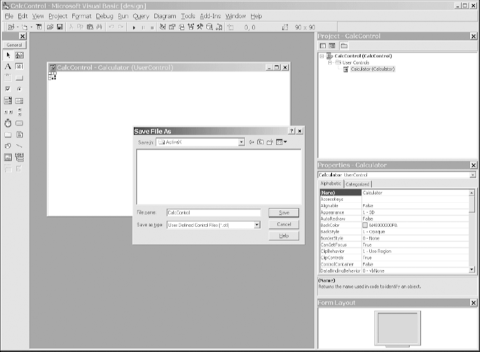 Now you can add the four calculator functions by right-clicking the CalcControl form, selecting View Code from the pop-up menu, and typing in the VB code shown in Example 22-1. Example 22-1. Implementing the CalcControl ActiveX controlPublic Function _
Add(left As Double, right As Double) _
As Double
Add = left + right
End Function
Public Function _
Subtract(left As Double, right As Double) _
As Double
Subtract = left - right
End Function
Public Function _
Multiply(left As Double, right As Double) _
As Double
Multiply = left * right
End Function
Public Function _
Divide(left As Double, right As Double) _
As Double
Divide = left / right
End Function
This is the entire code for the control. Compile this to the CalcControl.ocx file by choosing File, Make CalcControl.ocx on the Visual Basic 6 menu bar. Next, open a second project in VB as a standard executable (EXE). Name the form TestForm and name the project CalcTest. Save the file and project as CalcTest. Add the ActiveX control as a component by pressing Ctrl-T and choosing CalcControl from the Controls tab, as shown in Figure 22-2. Figure 22-2. Adding the CalcControl to the VB6 toolbox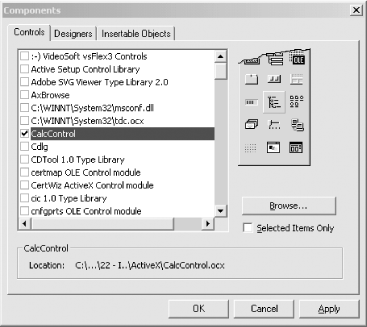 This action puts a new control on the toolbox, as shown circled in Figure 22-3. Figure 22-3. Locating CalcControl in the VB 6 toolboxDrag the new control onto the form TestForm and name it CalcControl. Note that the new control will not be visible; this control has no user interface. Add two text boxes, four buttons, and one label, as shown in Figure 22-4. Figure 22-4. Building the TestForm user interface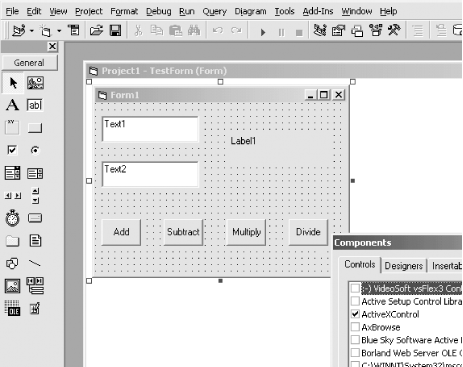 Name the buttons btnAdd, btnSubtract, btnMultiply, and btnDivide. All that is left is for you to implement methods for handling the button-click events of the calculator buttons. Each time a button is clicked, you want to get the values in the two text boxes, cast them to double (as required by CalcControl) using the VB6 CDbl function, invoke a CalcControl function, and print the result in the label control. Example 22-2 provides the complete source code. Example 22-2. Using the CalcControl ActiveX control in a VB program (TestForm)Private Sub btnAdd_Click( )
Label1.Caption = _
calcControl.Add(CDbl(Text1.Text), _
CDbl(Text2.Text))
End Sub
Private Sub btnDivide_Click( )
Label1.Caption = _
calcControl.Divide(CDbl(Text1.Text), _
CDbl(Text2.Text))
End Sub
Private Sub btnMultiply_Click( )
Label1.Caption = _
calcControl.Multiply(CDbl(Text1.Text), _
CDbl(Text2.Text))
End Sub
Private Sub btnSubtract_Click( )
Label1.Caption = _
calcControl.Subtract(CDbl(Text1.Text), _
CDbl(Text2.Text))
End Sub
22.1.2 Importing a Control in .NETNow that you've shown that the CalcControl ActiveX control is working, you can copy the CalcControl.ocx file to your .NET development environment. Once you have copied it, register the CalcControl.ocx file using Regsvr32. You're now ready to build a test program in .NET to use the calculator: Regsvr32 CalcControl.ocx To get started, create a Visual C# Windows Form project in Visual Studio .NET (see Chapter 13), name the project InteropTest, and design a form (such as the TestForm form you created in VB in the preceding section) by dragging and dropping controls onto it. Name the form TestForm. A complete sample form is shown in Figure 22-5. Figure 22-5. Building a Windows Form to test the CalcControl ActiveX control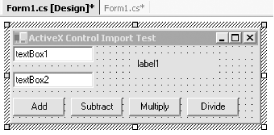 22.1.2.1 Importing a controlThere are two ways to import an ActiveX control into the Visual Studio .NET development environment: you can use the Visual Studio .NET tools themselves, or import the control manually using the aximp utility that ships with the .NET SDK Framework. To use Visual Studio .NET, choose Tools, Customize Toolbox from the menu. On the COM Components tab, find the CalcControl.Calculator object you just registered, as shown in Figure 22-6. Figure 22-6. Importing the CalcControl ActiveX control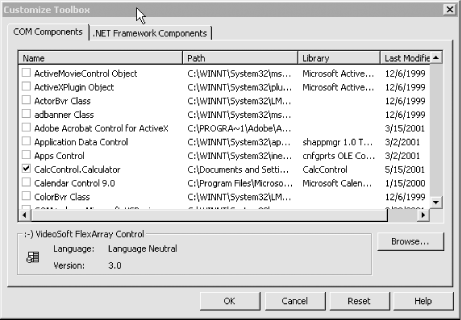 Because CalcControl is registered on your .NET machine, the Visual Studio .NET Customize Toolbox is able to find it. When you select the control from this dialog box, it is imported into your application; Visual Studio takes care of the details. Alternatively, you can open a command box and import the control manually using the aximp.exe utility, as shown in Figure 22-7. Figure 22-7. Running aximp aximp.exe takes one argument, the ActiveX control you want to import (CalcControl.dll). It produces three files:
22.1.2.2 Adding a control to the Visual Studio toolboxOnce this is done, you can return to the Customize Toolbox window, but this time select .NET Framework Components. You can now browse to the location at which the .NET Windows control AxCalcControl.dll was generated and import that file into the toolbox, as shown in Figure 22-8. Figure 22-8. Browsing for the imported control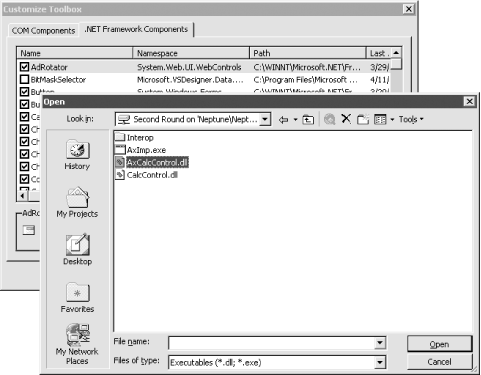 Once imported, the control appears on the toolbox menu, as shown in Figure 22-9. Note that the control may appear at the bottom of the toolbox. Figure 22-9. Viewing the AxCalcControl calculator after importing it into the toolbox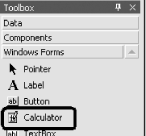 Now you can drag this control onto your Windows Form and make use of its functions, just as you did in the VB6 example. Add event handlers for each of the four buttons. The event handlers will delegate their work to the ActiveX control you wrote in VB6 and imported into .NET. The source code for the event handlers is shown in Example 22-3. Example 22-3. Implementing event handlers for the test Windows Formprivate void btnAdd_Click(object sender, System.EventArgs e)
{
double left = double.Parse(textBox1.Text);
double right = double.Parse(textBox2.Text);
label1.Text = axCalculator1.Add( ref left, ref right).ToString( );
}
private void btnDivide_Click(object sender, System.EventArgs e)
{
double left = double.Parse(textBox1.Text);
double right = double.Parse(textBox2.Text);
label1.Text = axCalculator1.Divide(ref left, ref right).ToString( );
}
private void btnMultiply_Click(object sender, System.EventArgs e)
{
double left = double.Parse(textBox1.Text);
double right = double.Parse(textBox2.Text);
label1.Text = axCalculator1.Multiply(ref left, ref right).ToString( );
}
private void btnSubtract_Click(object sender, System.EventArgs e)
{
double left = double.Parse(textBox1.Text);
double right = double.Parse(textBox2.Text);
label1.Text = axCalculator1.Subtract(ref left, ref right).ToString( );
}
Each implementing method obtains the values in the text fields, converts them to double using the static method double.Parse( ), and passes those values to the calculator's methods. The results are cast back to a string and inserted in the label, as shown in Figure 22-10. Figure 22-10. Running the imported ActiveX Control in a Windows Form |
| [ Team LiB ] |
|