| [ Team LiB ] |
|
3.2 Start the InstallationTo begin installing Linux, you must boot your system from the installation media. Most recently manufactured PCs can boot the Installation CD 1 Red Hat Linux CD-ROM. However, unless you generally boot from a CD-ROM�which is quite unlikely�you'll need to reconfigure your PC's BIOS so your PC is able to boot from a CD-ROM. To do so, enter your PC's BIOS screen and look for a configuration item titled something like Boot Order or Boot Priority. Change the configuration so that the CD-ROM drive has the highest boot priority. Consult your PC's documentation for details on entering and using its BIOS configuration screens. 3.2.1 Creating a Boot FloppyIf your PC can't boot from a CD-ROM, you must create a boot floppy disk. Creating a boot floppy requires some special measures; you can't simply copy files onto a disk and then boot it. To create a Red Hat Linux installation boot floppy by using a PC that runs Microsoft Windows, perform the following steps:
Figure 3-1. Using rawrite to make a boot diskette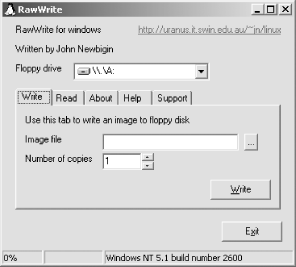
3.2.2 Boot the Installation ProgramTo start the installation process, insert Installation CD 1 of Red Hat Linux into your system's CD-ROM drive. If your system cannot boot from a CD-ROM, insert the boot floppy you created and reboot your PC. When the system reboots, you should see a start-up screen featuring a boot: prompt and a series of messages explaining how to invoke the graphical and text mode installation and upgrade facilities, as shown in Figure 3-2. This prompt lets you enter special parameters to work around a variety of installation problems. Generally, it's not necessary to do so. Simply press Enter or wait about a minute and the installation program will start. Figure 3-2. The installation start-up screen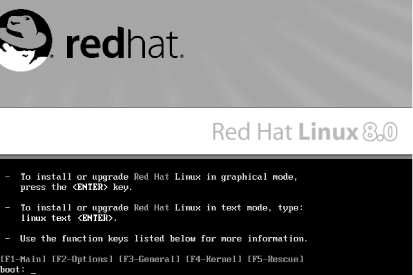 If you downloaded your installation media, you'll next see the screen shown in Figure 3-3. This screen lets you verify the contents of the installation CD-ROMs. Verification takes from 5 to 20 minutes per CD, depending on the speed of your system. However, by verifying your media, you can avoid problems that might otherwise be difficult to troubleshoot. Figure 3-3. The CD Found screen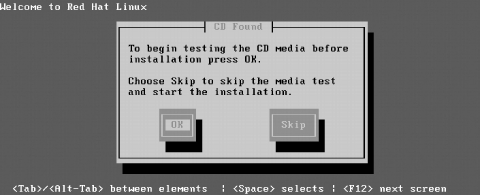 Figure 3-4. The Red Hat Linux Welcome screen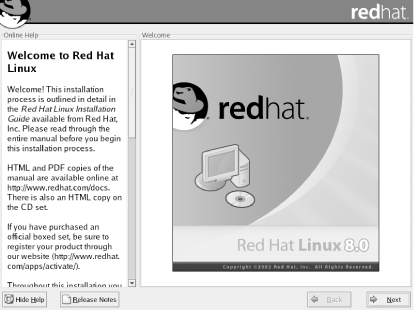 3.2.3 The Installation Program's User InterfaceLike other modern Linux distributions, Red Hat Linux includes a graphical installation program that simplifies the installation and initial configuration of Linux. Figure 3-5 shows a typical screen displayed by the installation program. You won't see this particular screen until later in the installation process. Figure 3-5. A typical installation screen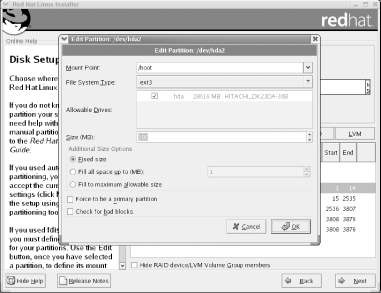 The installation screen includes the following elements:
3.2.4 Use Virtual Consoles to Monitor the InstallationA console is a combination of a keyboard and a display device, such as a video monitor. A console provides a basic user interface adequate to communicate with a computer: you can type characters on the keyboard and view text on the display device. Although a home computer system seldom has more than one console, Linux systems provide several virtual consoles. By pressing a special combination of keys, you can control which console your system's keyboard and monitor are connected to. Table 3-1 describes the virtual consoles used by the installation program. The main installation dialog appears in virtual console #7. If you like, you can use the indicated keystrokes to view a different virtual console.
The contents of virtual consoles #1 through #5 can be useful in monitoring and troubleshooting; you will not generally need to switch from one virtual console to another. Nevertheless, you may find it interesting to view the contents of the virtual consoles during the installation procedure. 3.2.5 Choose the Installation LanguageClick Next to move from the Installation screen to the Language Selection screen. Figure 3-6 shows that screen, which asks you to specify what language should be used during the installation process. Click the desired language and then click Next. The Keyboard Configuration screen appears. Figure 3-6. The Language Selection screen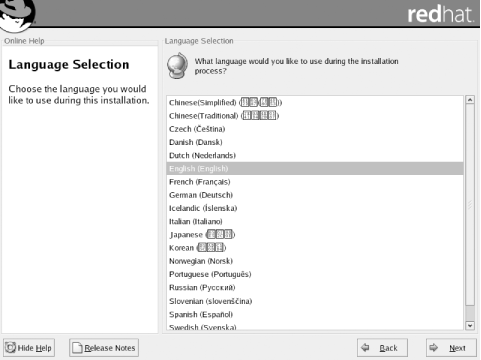 3.2.6 Select the Keyboard TypeThe Keyboard Configuration screen, shown in Figure 3-7, lets you specify the type of keyboard attached to your system. The preselected choice is appropriate for most U.S. users. If you prefer another keyboard configuration, click the desired model or layout. Then, click Next to proceed. The Mouse Configuration screen appears. Figure 3-7. The Keyboard Configuration dialog box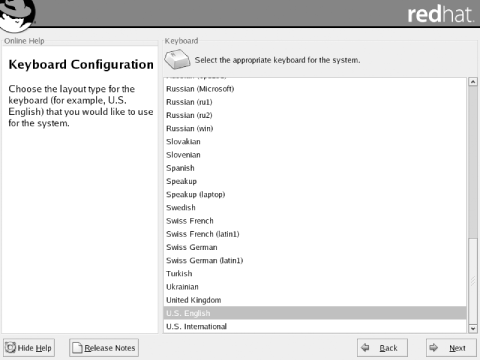 3.2.7 Select the Mouse TypeThe Mouse Configuration screen, shown in Figure 3-8, lets you specify the type of mouse attached to your system. The installation program generally determines the type of mouse automatically. If you prefer a different mouse configuration, click the desired mouse type. Many graphical Linux programs are designed to use a three-button mouse. If your mouse has only two buttons, you should generally enable the Emulate 3 Buttons checkbox. Click Next to proceed to the Installation Type screen. Figure 3-8. The Mouse Configuration screen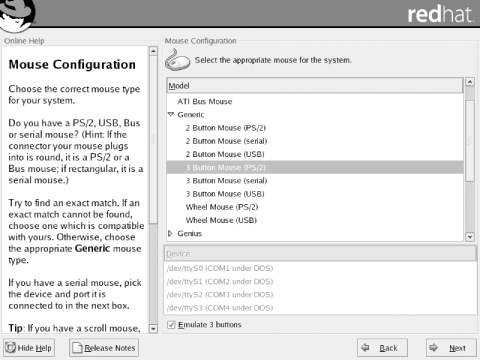 3.2.8 Select the Installation TypeThe Installation Type screen, shown in Figure 3-9, lets you choose whether to perform any of four types of fresh installations or an upgrade of your existing Red Hat system. The Install options�Personal Desktop, Workstation, Server, and Custom�are described in Chapter 2. As explained, the appropriate choice for most users is Custom. Therefore, click the radiobutton next to Custom and click Next to proceed. Figure 3-9. The Installation Type screen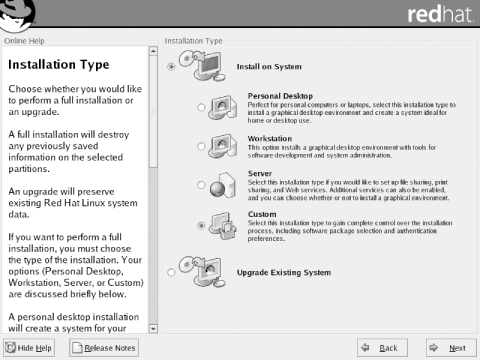
3.2.9 Create PartitionsDruids in Red Hat Linux are analogous to wizards in Microsoft Windows. In the next phase of the installation procedure, you use Red Hat's Disk Druid to establish Linux partitions on your hard disk drive. Figure 3-10, the Disk Partitioning Setup screen, appears. Disk Druid is generally capable of automatically creating the necessary partitions. Figure 3-10. The Disk Partitioning Setup screen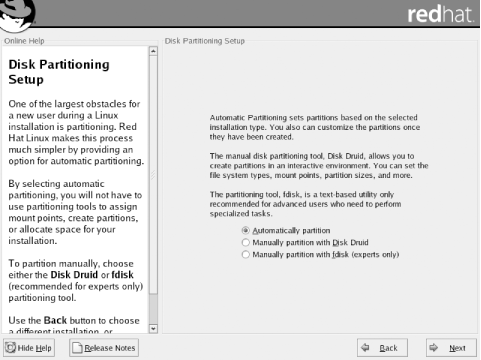 If you prefer, the installation program lets you manually partition your hard disk using Disk Druid. However, it's generally easier to allow Disk Druid to automatically partition the hard disk and then review and edit the results. No changes are made to the partition table until you accept the final results. The installation program also provides a third partitioning method, manual partitioning via fdisk. However, as the Disk Partitioning Setup screen suggests, this program is suitable only for experts. Unlike Disk Druid, fdisk does not check that your partitions have been properly defined. Unless you're familiar with fdisk, it's best to avoid using it until you gain more experience with Linux. So, you can generally click Automatically partition and click Next to proceed. The Automatic Partitioning screen appears, as shown in Figure 3-11.
Figure 3-11. The Automatic Partitioning screen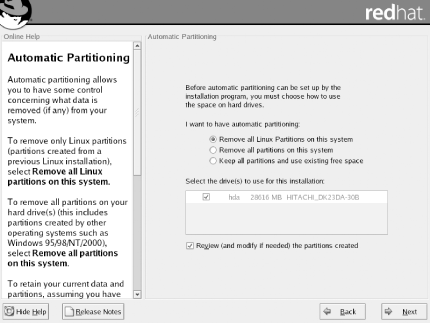 The Automatic Partitioning screen lets you choose how any existing partitions are treated. Three choices are available:
If you want to preserve an existing operating system, you should not choose Remove all partitions on this system. If you want to overwrite an existing Linux installation, choose Remove all Linux partitions on this system. Otherwise, choose Keep all partitions and use existing free space. The Automatic Partitioning screen also lets you specify the hard disks on which the installation program will load Red Hat Linux. You can prevent the installation program from using a hard disk by clearing the checkbox associated with the hard disk. Finally, the Automatic Partitioning screen lets you specify whether to review the results of automatic partitioning. You should generally leave the associated checkbox set so that you can modify the results, if needed. Click Next to perform automatic partitioning. If Disk Druid cannot find sufficient free space, you may see a dialog box announcing an error. In that case, you can use the Back button to return to the Disk Partitioning Setup screen and choose manual partitioning with Disk Druid. The following section explains how to review and modify the results of automatic partitioning, and also equips you to perform manual partitioning. 3.2.9.1 Manual disk partitioningThe Disk Setup screen, shown in Figure 3-12, lets you add, edit, and delete Linux partitions. The bottom part of the screen contains a list box that describes each drive and partition. The middle part of the screen contains buttons that control the operation of Disk Druid, the tool that carries out partitioning. The top part of the screen graphically depicts the partition structure. Figure 3-12. The Disk Druid screen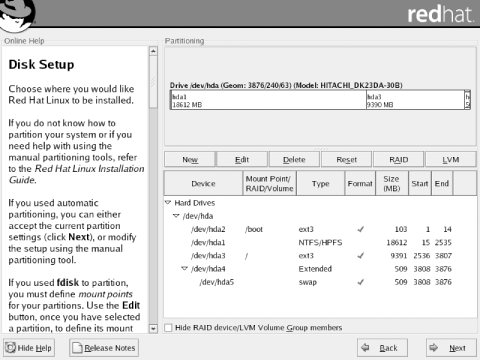 3.2.9.2 What to addWhereas Windows associates drive letters, such as D:, with partitions, Linux associates directories�known as mount points�with partitions. Two such directories, / (the root directory) and /boot, are essential. In addition, a third partition is necessary to manage your system's RAM. This partition has no associated mount point. During this step of the installation process, you should establish three Linux partitions on your system's hard drive:
3.2.9.2.1 Create the swap partitionFrom the Disk Setup screen, click New to launch the Add Partition dialog box, shown in Figure 3-13. Figure 3-13. The Add Partition dialog box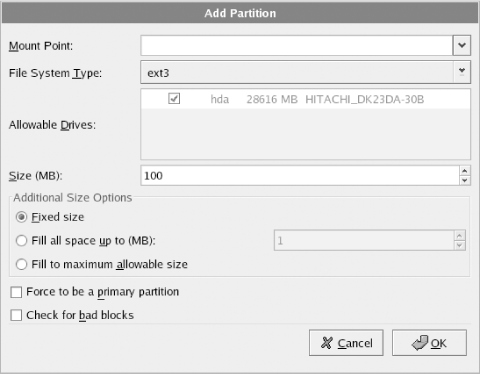 Enter the following values in the Add Partition dialog box:
Click OK to accept the input values. The Add Partition dialog box disappears. 3.2.9.2.2 Create the /boot partitionFrom the Disk Setup screen, click New to launch the Add Partition dialog box. Enter the following values:
Click OK to accept the input values; or, if you don't want to create the partition, click Cancel. The Add Partition Dialog box disappears. If you enter an inappropriate value, Disk Druid may be unable to create the requested partition. In such a case, it displays a dialog box that explains the reason the partition could not be created. Study the dialog box to determine what you did wrong and try again. 3.2.9.2.3 Create the / partitionFrom the Disk Setup screen, click New to launch the Add Partition dialog box. Enter the following values:
Click OK to accept the input values. The Add Partition dialog box disappears. 3.2.9.3 Editing a partitionIf you wish to change one or more values associated with a partition, highlight the partition you wish to change in the Disk Setup screen and click Edit. Disk Druid launches a dialog box that you can use to change the mount point of a previously existing partition or other options of a partition you've just created. You cannot use the Add Partition dialog box to change the size, grow option, or type of a previously existing partition; instead, you must delete such a partition and re-create it. 3.2.9.4 Deleting a partitionIf you wish to delete a partition, highlight it and click Delete. Disk Druid presents a dialog box that asks you to confirm the operation.
3.2.9.5 Starting overIf you determine that you've made mistakes and want to abandon the changes you've specified, simply click Reset. Disk Druid resets all partitions to their original state. 3.2.9.6 Saving your changesWhen you're done, save your changes and proceed with the installation, by clicking Next. 3.2.10 Configure the Boot LoaderNext, the installation program presents the Boot Loader Configuration screen, shown in Figure 3-14. GRUB, the Grand Unified Boot loader, is a special program used to start Linux�or another operating system�when you boot your system. This screen lets you choose an alternative boot loader (LILO) or omit installation of a boot loader altogether. You can also specify the location where GRUB will be installed. Figure 3-14. The Boot Loader Configuration screen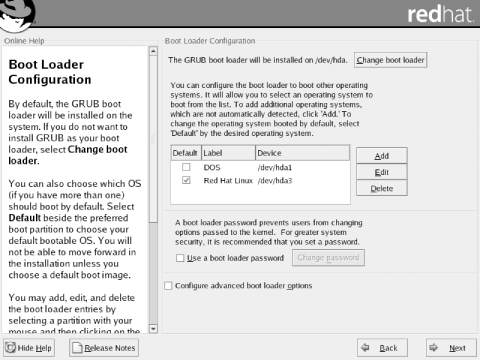 If you're among those bothered by GRUB, you can easily avoid GRUB. To do so you can boot Linux by using the boot floppy prepared near the end of the installation procedure. Linux won't boot as quickly as it might, but you won't face the prospect of disabling your other operating system if you're running a dual-boot system. Switching from GRUB to LILO is unlikely to help, as LILO is vulnerable to the same problems affecting GRUB. The Boot Loader Configuration screen lets you select the operating systems that GRUB will be able to boot. When GRUB boots your PC, GRUB displays a screen that lets you select from among the configured operating systems. The installation program preselects Linux as the default operating system. To specify a different default operating system, highlight the corresponding partition and click Default. If you like, you can change the label associated with an operating system by highlighting the corresponding partition and typing the desired label in the text box labeled Boot Label. When you've completely specified the desired boot loader configuration, click Next to proceed.
3.2.11 Configure NetworkingAfter you've configured the boot loader, the installation program probes for a network card. If it finds one, the installation program presents the Network Configuration screen, shown in Figure 3-15. If your computer is attached to a Local Area Network (LAN), you can use the Network Configuration screen to configure networking. If your computer is not attached to a LAN, click Next. Figure 3-15. The Network Configuration screen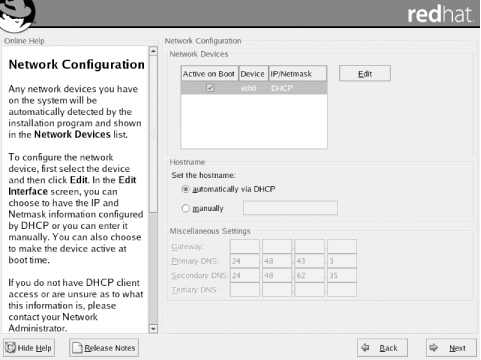 If your LAN provides a DHCP server, Red Hat Linux can automatically determine your PC's network configuration when your PC boots. By default, the installer configures your PC to activate its network adapter and obtain its network configuration from a DHCP server whenever your PC is booted. If you want to assign your PC a static IP address or if you don't want your network adapter to be activate when your system boots, click the Edit button. An Edit Interface dialog box, shown in Figure 3-16, appears. To specify a static IP address, clear the checkbox labeled Configure using DHCP. Then, enter the IP address and netmask in the proper text fields, using the information you recorded in Table 2-1. If you don't want your network adapter to be activated when your system boots, clear the checkbox labeled Active on boot. Click OK to save your changes. Figure 3-16. The Edit Interface dialog box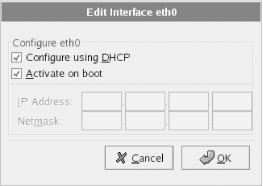 If you want to assign your system a static IP address, you should select the radiobutton labeled Set the hostname manually in the Network Configuration Screen. You should also provide the following from Table 2-1:
When you've entered the desired network configuration, click Next to proceed. The Firewall Configuration screen, shown in Figure 3-17, appears. This screen lets you specify protection against threats originating across the network. Figure 3-17. The Firewall Configuration screen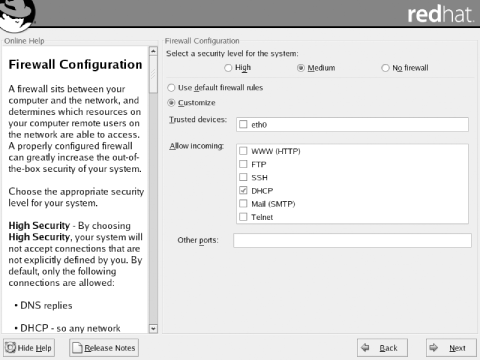 Chapter 12 explains the firewall capabilities of Red Hat Linux in more detail. If you're especially concerned about network security, you should select the High security option; otherwise, you should select Medium security. If your system obtains its network configuration from a DHCP server, you should leave the checkbox labeled Allow incoming DHCP enabled. Make your choices and click Next to proceed.
3.2.12 Configure the LanguageNext, the installation program presents the Additional Language Support screen, shown in Figure 3-18. You earlier selected the language used during the installation procedure; this screen has a different function. It lets you select the default language in which the desktop is presented. It also lets you install support�including X fonts and spelling dictionaries�for one or more additional languages. As the screen explains, multiple languages consume significant disk space. So, select a single language if you're reasonably content doing so. After you've made your choice or choices, click Next to proceed. Figure 3-18. The Additional Language Support screen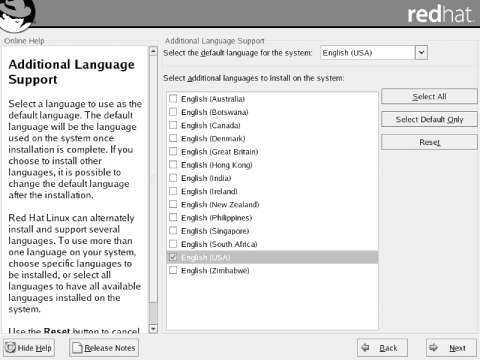 3.2.13 Configure the System ClockAfter you bypass or complete the Network Configuration screen, the installation program presents the Time Zone Selection screen, shown in Figure 3-19. Select a time zone by clicking on the map or by clicking an entry in the list box that appears below the map. Figure 3-19. The Time Zone Selection screen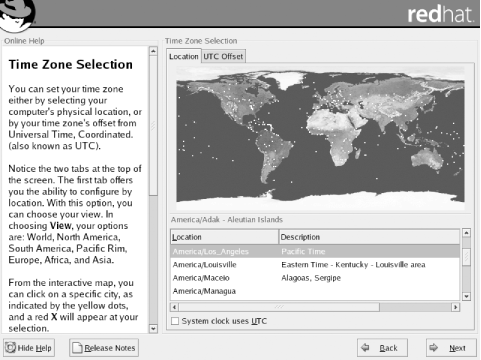 If you want to set your system's clock to UTC (Universal Coordinated Time), enable the System Clock Uses UTC checkbox. However, you should not enable this checkbox if your PC is set up to boot an operating system, such as Microsoft Windows 9x, that does not support setting the system clock to UTC. After making your selections, click Next to proceed. 3.2.14 Configure User Accounts and AuthenticationThe user who administers a Linux system is known as the root user, or simply root. To protect your system against mischief and misadventure, you must protect the root user's login with a password. To enable you to do so, the installation program presents the Account Configuration screen, shown in Figure 3-20. Figure 3-20. The Account Configuration screen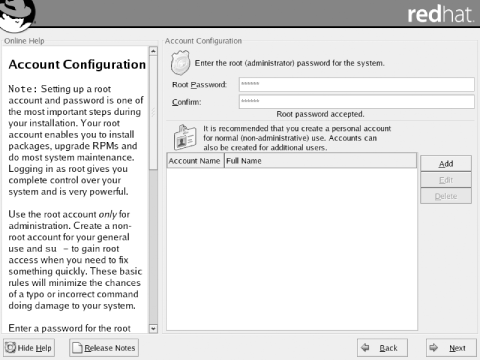 Simply choose a password for the root user and type it twice: in the text field labeled Root Password and the nearby text field labeled Confirm.
You should establish at least one additional user account during system installation. You can use this account when not performing system administration, thereby avoiding unnecessary use of the root account, which might lead to a breach of system security or integrity. To create the account, click Add. Then, type the account name, user's full name, and the password (twice). You can establish additional user accounts during system installation if you like, but it's generally easier to establish them after system installation is complete. Once you've specified the password for the root account and have set up an additional user account, click Next to proceed. The installation program shows the Authentication Configuration screen, shown in Figure 3-21. Figure 3-21. The Authentication Configuration screen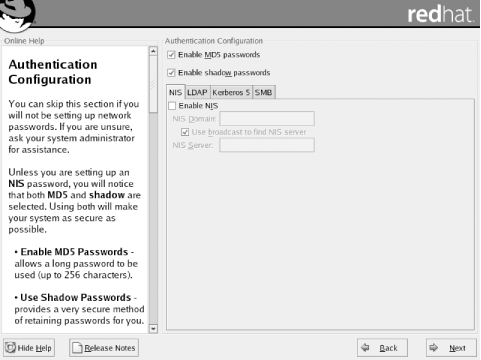 Generally, the default options are appropriate: both Enable MD5 Passwords and Enable Shadow Passwords should be enabled. MD5 lets you use passwords longer than eight characters; shadow passwords hides encrypted passwords from ordinary users. Only in special circumstances would it be necessary or appropriate to disable either option. Unless your PC is part of a network that uses NIS, LDAP, Kerberos, or SMB, you don't need to specify options associated with these tabs. Otherwise, consult your network administrator to determine the appropriate settings. Click Next to proceed. The Package Group Selection screen appears. 3.2.15 Select PackagesTo install an application under Red Hat Linux, you generally install a package that contains all the files needed by the application. If you like, you can specify the individual packages you want to install; however, the large number of available packages makes it tedious to specify them one at a time. Instead, the installation program lets you specify package groups you want to install. A package group is simply a group of related packages. The Package Group Selection screen, shown in Figure 3-22, lets you specify which packages should be installed. Simply enable the checkbox associated with each desired package group. The installation program has preselected several package groups for you. Figure 3-22. The Package Group Selection screen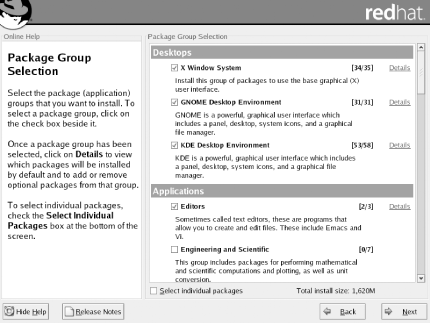 Generally, you should select the following package groups, some of which may have been preselected for you:
In addition, you can choose from among the available optional package groups, according to your interests and the characteristics of your system. Peruse the install program's list to see what's available. The Package Group Selection screen shows the approximate size of the selected package groups in its lower-right corner. If you don't know what package groups to select, don't worry; you can install additional package groups after setting up your Red Hat Linux system. If, on the other hand, you want to be able to select individual packages as well as package groups, enable the Select Individual Packages checkbox. When you're satisfied with your choices, click Next to proceed. If you checked the Select Individual Packages checkbox, the Individual Package Selection screen appears. Select any desired packages. Then, click Next to proceed.
If you requested installation of individual packages, the Unresolved Dependencies screen may appear. You should generally accept the preselected option, Install packages to satisfy dependencies. Click Next to proceed. 3.2.16 Install PackagesWhen the installation program is ready to begin installing packages, it presents the About to Install screen, shown in Figure 3-23. Up to this point, the installation program has made no changes to your system's hard drive. This is your last chance to terminate the installation procedure before any data is written. To abort the installation procedure, press Ctrl-Alt-Delete or press your system's hardware reset button. Figure 3-23. The About to Install screen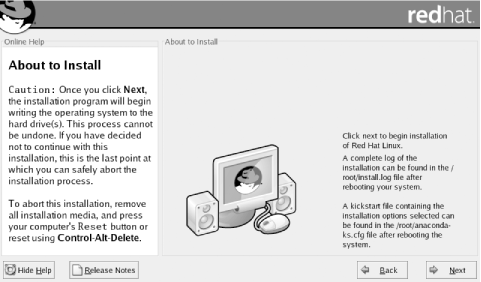 The installation program now formats any partitions you earlier specified for formatting. Depending on the size of your system's hard drive, it may require several minutes to complete this step. When formatting is done, the Installing Packages screen, shown in Figure 3-24, appears and the installation program begins installing packages. Figure 3-24. The Installing Packages screen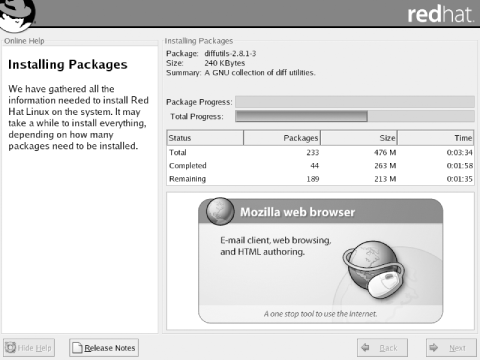 The Installing Packages screen displays the name of each package as it is installed and presents a progress bar that shows the relative progress of the installation process. You'll likely be asked to insert other installation CDs during the installation process. When all the packages have been installed, you're ready to create a boot diskette. Click Next to proceed. 3.2.17 Create a Boot FloppyThe installation program next gives you the opportunity to create a boot floppy, by presenting the Boot Disk Creation screen, shown in Figure 3-25. This floppy is not the same as the one you may have created and used to start the installation procedure. You should take the opportunity to create the boot floppy, because it may enable you to boot your Linux system even if the boot loader fails to install properly or the system boot information is damaged. Figure 3-25. The Boot Disk Creation screen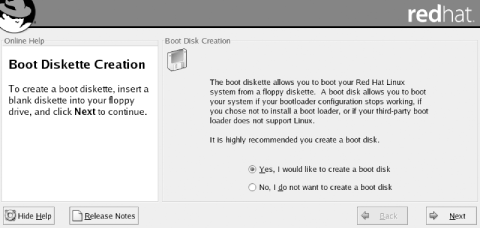 To create a boot floppy, click Next. The installation program will prompt you to insert a blank floppy in your system's floppy drive. Insert the diskette and click OK. The installation program may take several minutes to create the boot floppy. 3.2.18 Configure VideoNext, the installation program displays the Graphical Interface (X) Configuration screen, shown in Figure 3-26, which helps you configure X, the Linux graphical user interface. If the installation program was able to determine the type of video card associated with your PC, it will highlight the appropriate item in the X Configuration list box. If you prefer to specify a different video card, click the desired item. Figure 3-26. The Graphical Interface (X) Configuration screen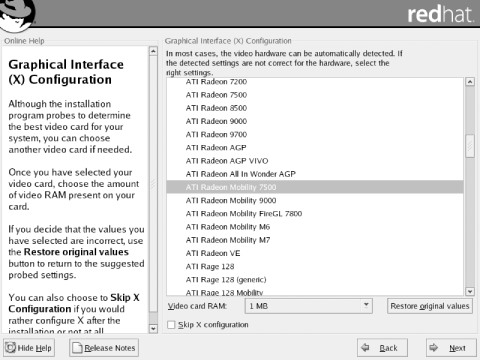 If your video card is not listed, you may be able to use the Generic SVGA Compatible entry. This will yield a basic, working X configuration. Later, you can follow the instructions given in Appendix D to achieve a better configuration. You should specify the amount of video memory installed on your video card. Specifying a value that is too large will probably prevent X from starting. If you followed the procedure given in Chapter 2, you should have learned the amount of video memory installed on your card; otherwise, consult your video card's documentation to determine the proper value. If you can't locate the information, select a conservatively low value; choosing a value that's too low will prevent you from using high-resolution video modes but won't damage your monitor. Earlier in the installation, you specified the make and model of your system's video card. The next two screens guide you in completing the video configuration. 3.2.18.1 Identifying your system's monitorThe installation program next presents the Monitor Configuration screen, shown in Figure 3-27. The Monitor Configuration screen includes a list of supported video monitors. If the installation program was able to determine the type of monitor associated with your PC, it will highlight the appropriate item in the Monitor Configuration list box. If you prefer to specify a different monitor, click the desired item. Figure 3-27. The Monitor Configuration screen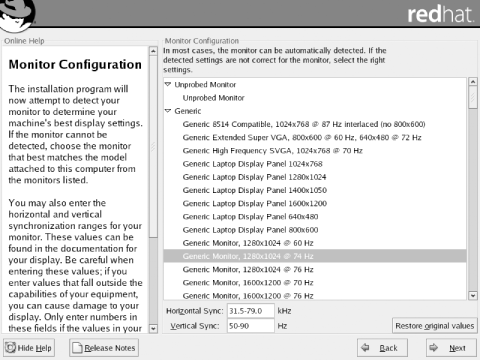
If you can't find your monitor listed, don't despair: you can select the Unprobed Monitor entry. If you do so, the installation program will suggest horizontal and vertical sync (also known as vertical refresh) rates or ranges. You should compare these with the characteristics of your monitor, which you can generally obtain from the owner's manual or from the manufacturer's web site; adjust the rates of ranges if necessary. If you fail to find information describing your monitor, you can try some conservative values that are unlikely to damage all but the oldest of monitors. Low values are safer than high values. For example, try setting the horizontal sync range to 50-70 kHz and the vertical sync rate to 60 Hz. Once you've selected your monitor or specified its sync rates, click Next to proceed. The Custom Graphics Configuration screen appears. 3.2.18.2 Selecting custom graphics optionsThe Custom Graphics Configuration screen, shown in Figure 3-28, lets you specify several X-related options. You can choose the color depth, which determines the number of colors your system will display. You can also choose the screen resolution, which determines the number of pixels your system will display. Larger resolutions result in greater detail; however, your system's video adapter and monitor may not operate with all possible settings. Moreover, specifying a high resolution will consume additional system resources, such as RAM. You can click the Test Setting button to see that a given setting works and what it looks like. When testing a setting a small, untitled dialog box appears asking if you can Read This Text; if so, click Yes to accept the current setting or No to reject it and try another setting. Figure 3-28. The Custom Graphics Configuration screen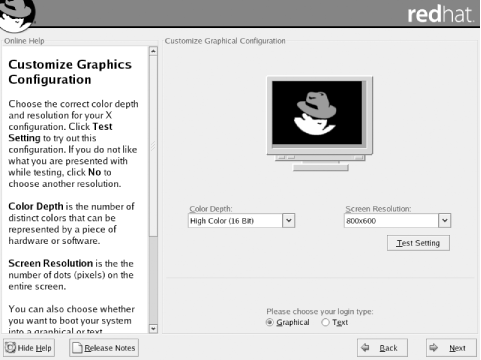 Check the Graphical radiobutton, which specifies that your Linux system will start in graphical mode. Graphical mode lets you use your system's mouse and is therefore more familiar and comfortable for those unaccustomed to the Linux command-line interface than is Text mode. When you've completed the X configuration, click Next to proceed. 3.2.19 Complete the InstallationThe installation program then presents its final screen, shown in Figure 3-29, which explains that Red Hat Linux has been successfully installed. Figure 3-29. The Congratulations screen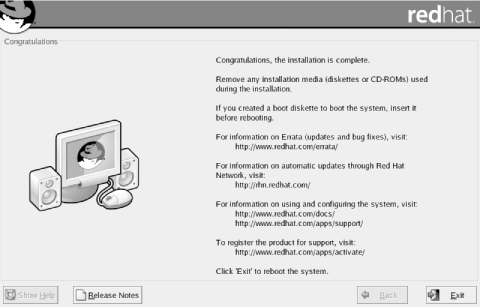 Try booting your system from its hard drive or a Linux boot floppy, as appropriate. If your system successfully boots Linux, you're ready to log in to your Red Hat Linux system. |
| [ Team LiB ] |
|